 .
.
Having made a RotaFota image you'll normally want to put it on the Internet for others to see. RotaFota makes it easy to publish your images using this simple facility.
The Upload window can be accessed from Step 5 by pressing the Upload to Web button.
Step 5
The Upload to Webspace window looks like this:
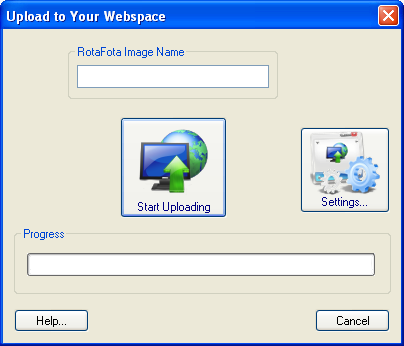
If this is the first time you are uploading then you'll need to put in the upload settings for your webspace by clicking the Settings... button
.
Before clicking the Upload button you should specify a name for your RotaFota image. The name can be anything you like, but as a general rule it is advisable to keep to letters, numbers and hyphons (some web servers may not like more exotic names), and it is best avoid putting spaces in the name.
Note: If you give the same name as a previously uploaded RotaFota image then that one will be replaced by this new one when you upload it.
If you have previously put in the upload settings, then all you need to do is press the Upload button. The progress bar fills up as your RotaFota image gets uploaded to your webspace.
When uploading is complete you will see a confirmatory window showing you the web address where your RotaFota image can be viewed on the internet.
If you want to embed this RotaFota image in another web page, or use it on your Ebay™ sales listing then you can now achieve that with the Copy to Clipboard function.
The same files which get saved to your computer, in the Save As step, get uploaded to your webspace.
For those who are interested, here is a run-down of the files that get uploaded. Where whatever is written it means whatever you called your RotaFota image at the Save As step.
Related Topics: