This step is mainly about selecting the size for your RotaFota image. The RotaFota software makes this very easy for you.
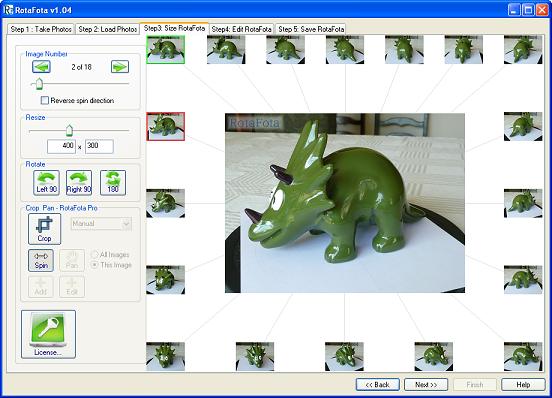
First we'll explain a little about the RotaFota software's window display...
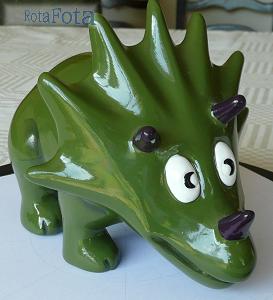
You'll see that all the photos you loaded in Step 2 are arranged around the edge of the window as small thumbnail images. In the centre of the window is a fully functioning RotaFota image. You can click your mouse in it and drag left/right to rotate it, just like with the RotaFota images in your web browser.
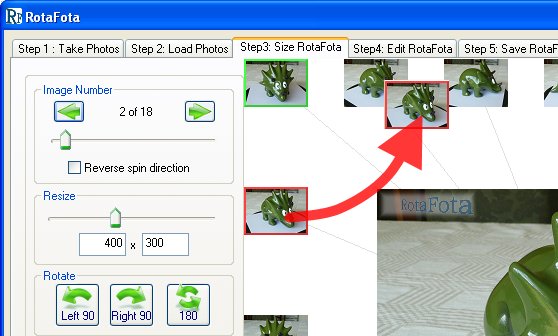
If you look closely at the thumbnail images around the edge, you'll see that one has a green frame and one has a red frame.
The thumbnail image with the red frame is the one which matches the big image shown in the centre of the window. As you rotate the central RotaFota image, the red frame will move from thumbnail to thumbnail around the edge of the window, indicating which is currently shown. You can click on any thumbnail to make it the active image shown in the centre.
The thumbnail image with the green frame is the one which will be displayed as the start image on the final saved RotaFota image (i.e. the one a person will see at first when they view your web page).
You can choose any of the photos to be the start image. Simply right-click the mouse over the image you want. A menu will pop-up with a choice of Set Start Image. Select this option and that thumbnail will then show the green frame. This right-click menu is also available on the central image: which ever image it currently shows can be set as the Start image.
Sometimes you will want to delete a photo. For example, if you took too many photos and the first and last photos duplicate views.
To delete a photo simply right-click on its thumbnail and select Remove this image from the pop-up menu.
Occasionally the photos may get loaded out of sequence. This will be obvious on the central RotaFota image as you spin it: the animation will be seen to jump back and forth instead of rotating smoothly.
If you need to rearrange the sequence, simply click (and hold down with the mouse button) on a thumbnail that is out of sequence and drag it to where you want to put it (and release the mouse button).
At the top left of the window is a slider and arrow buttons which can be used to process through the images and change the active image in the centre of the display. Of course you can just click and drag left/right on the central image too.
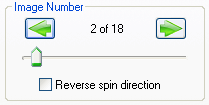
You also have a Reverse spin direction check box to flip the spin direction of your RotaFota image. This is useful when the RotaFota image appears to spin the opposite way to which you feel is intuitive in response to dragging the mouse left/right over it.
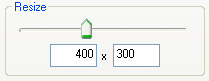
On the left side of the window is a slider bar for you to select the size for your RotaFota image. The central image on the display will expand or shrink as you slide the size up or down. The edit boxes show the exact image dimensions (measured in pixels). You can just type in the required size if you know what you want. The image will always retain its aspect ratio (i.e. if you alter the width then the height will automatically alter in proportion, and vice versa).
The RotaFota software does all the hard work for you, and resizes the whole set of photos with this single operation.
Sometimes it is necessary to turn your photos on their side. This will usually be because you had the camera on its side when taking the photos (portrait style).
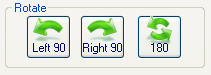
Press the appropriate button and the RotaFota software will do all the hard work in turning all your images over.
If you use the Crop and Pan functions you will need a RotaFota Pro license to save the resulting RotaFota image.
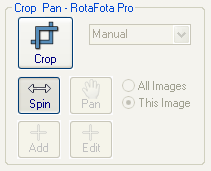
Often when you get your photos loaded, you will see that your subject does not fill the whole picture. This is where the Crop function is extremely useful. You can select a rectangular portion of your photo to use. The RotaFota software does all the hard work for you and applies the same cropping to all the photos in the set.

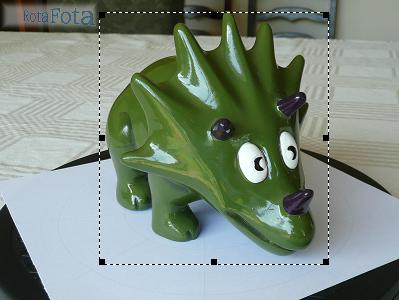

When you click the Crop button you will see a selection rectangle appear on the main image. You can use the black edge and corner markers to stretch the selection rectangle to cover your desired portion of the image. Click inside the selection rectangle to drag it around the image without stretching it.
There is a drop-down menu with a series of common aspect ratios for images.
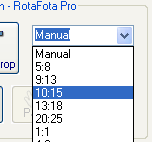
If you select one of these aspect ratios then the selection rectangle will maintain this shape as you stretch it. This can be very useful if you want to make a set of identical size RotaFota images.
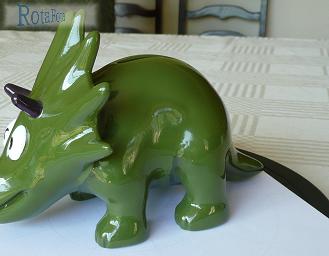
After you have applied a crop boundary, the Pan function will be available. This is a very useful facility which allows you to slide the image around within its cropped rectangle. You can pan the image in any direction up/down/left/right until it hits the extent of the original uncropped image.
The RotaFota software pans the whole image set for you (if you have the All images option selected next to the pan button). You can also choose to pan just the active image by selecting the This image option next to the pan button. This can be extremely useful where one image needs to be shifted over a bit to make it line up with the others when the RotaFota image is being spun.
If need be, you can quickly make individual panning shifts to each of the images in turn. You can flick from image to image using the image slider, the left/right arrow buttons, or by clicking on the thumbnails around the edge of the window. This can make a huge improvement for image sets where you held the camera in your hands while taking the photo sequence.
To assist with accuracy in positioning each photo in the sequence, you can add crosshair guide-lines over the picture.
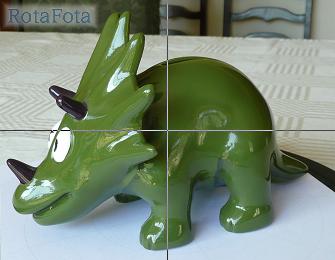
The guide-lines are for visual assistance in the panning operation and do not show on the final RotaFota image.
You can move the guide-lines to line-up with some feature on the photos which should remain stationary from picture to picture,
and then flip between the images panning each slightly to line up with the guide-lines.
To position the guide-lines click the ![]() button and then move the mouse near the guide-line on the image which you want to move and click and drag it to where you want it.
If you drag the guide-line right off the image then both of the crosshair pair will be removed.
You can add and position several pairs of crosshair guide-lines if required.
button and then move the mouse near the guide-line on the image which you want to move and click and drag it to where you want it.
If you drag the guide-line right off the image then both of the crosshair pair will be removed.
You can add and position several pairs of crosshair guide-lines if required.
After you have cropped and panned your photos you can still use the resize options to shrink or grow the RotaFota image. All your cropping and panning work will be retained as though you had done it at the new size, retaining all the detail from the original images.
Related Topics: